Anti aliasing settings in my opinion are vague, more options should be appreciated like image blur or aa levels etc. instead of low normal high.
Anti Aliasing Image Blur Feature
Hi Taylan,
thx for your feedback, we’ve removed any aa numbers because to a lot of people they only mean confusion.
I agree there can be a bit more documentation about it. Todo for us.
Anti aliasing is done in range from none to high.
none: only black or white
low: 4 shades of gray
default (medium): 16 shades of gray. (usually enough)
high: 256 shades of gray.
The higher you set it the more time/memory it costs.
Usually 16 is enough. Default setting.
regarding blur; did you have good results with this?
We could always add a blur filter to blur the edge; as a matter of fact I think we already programmed it once but the results were not really noticable…
Elco
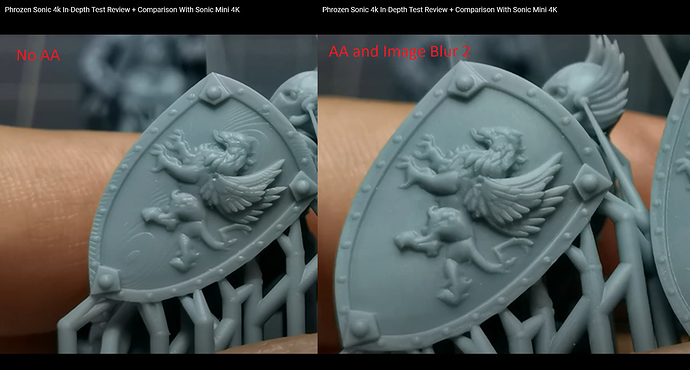
In chitubox it works with aa2 reduces the voxel lines pretty much and if I use with image blur 2 at the cost of surface detail it pretty much eliminates voxel lines. I don’t have any pictures to show but a channel named Dennys Wang managed to eliminate the voxels this much:
Hi Taylan,
Cool thx for this info.
I’ll check what this blur filter does; probably it blurs the pixels.
What you can do for now is activate our 3d anti aliasing features. This has been a bit expiremental over time but i think if they claim on that machine that blurring works; then 3d anti aliasing should also have some effect.
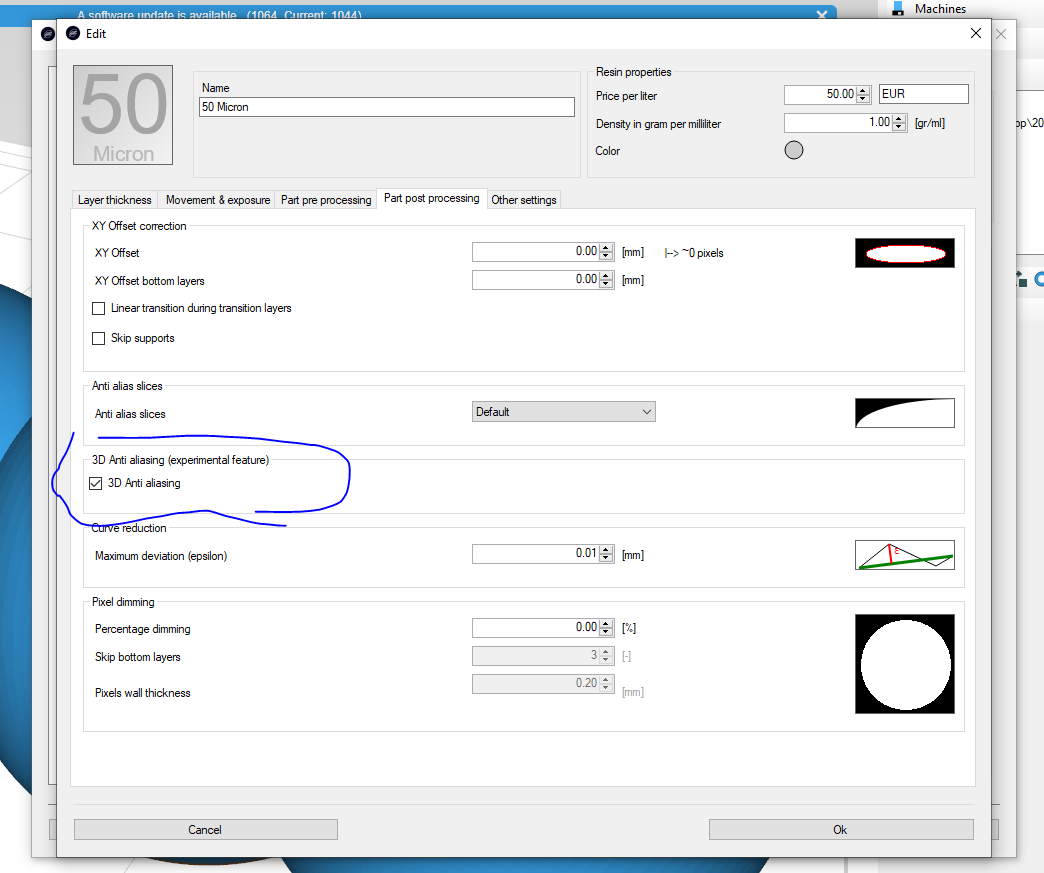
3d anti aliasing is not activated by default in print profiles; you can activate it by going into your settings file and putting “SettingAntiAliasing3D” to “true” on the machine that you desire.
This will give you this box:
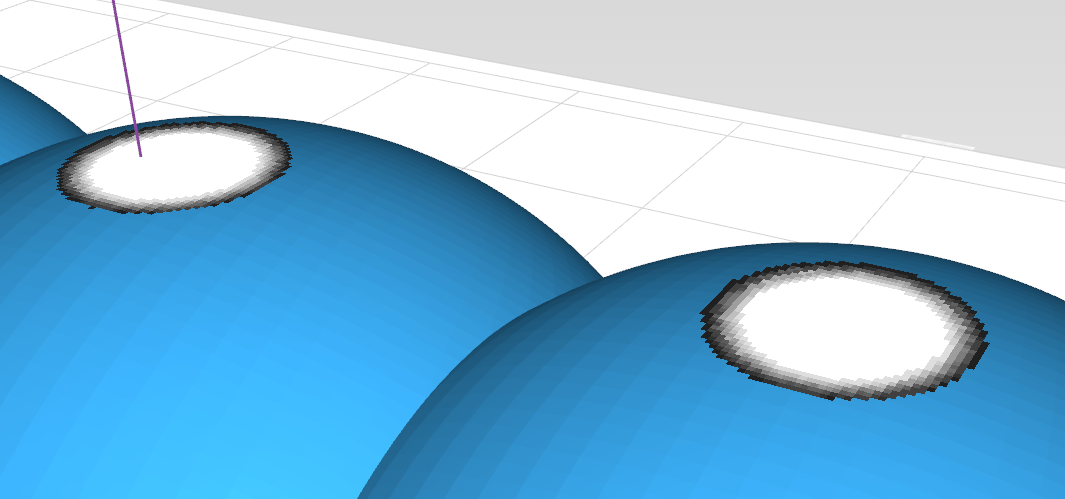
when you then slice a couple of spheres you will notice it also aliases in 3d direction; not just in the XY plane.
I am reviving this thread.
I have seen very smooth objects printed from Chitu slicing with Blur 2. May be you would consider adding Blur as an option?
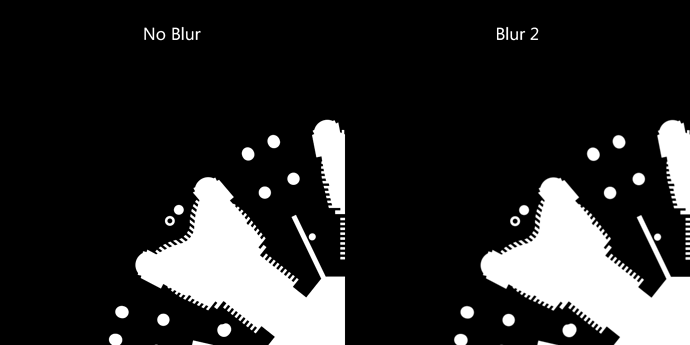
When “Blur” enabled Chitubox adds a “fog” around the edges of the object. But I think that mathematically the real effect is that the antialiasing is calculated not for perimeter pixels only, but across an outline of 2 pixels width (perimeter outline + 1 pixel witdh area outside).
Below is a comparison of “No Blur” and “Blur 2” extracted via UV Tools.
Hi Tom,
Thanks for the input.
Blur usually refers to ‘gaussian’ blur. This is a sort of averaging of pixels where the value of a pixel is an average of the surrounding pixels. You can do this for any number of border pixels of course.
I’ll consider adding it as experimental feature. But it’s not really well defined in what it does. Probably it only adds a sort of half cured layer of photopolymer to your model making it more sticky.
So if you have a single pixel of gray, then it will grow to the solid neighbours. If you have multiple i’m not sure what will happen… and you might have a gluey incured layer around the model depending on material and exposure.
kind regards
Elco
Elco,
it is a valid point. Shorter curing can make surface sticky. But after cleaning up I immediately cure the printouts, and I don’t suffer from half-baked surfaces at all. I wouldn’t raise Blur feature if I haven’t seen very good results of Chitu slicing with blur enabled. Of course Formware 3D anti aliasing is a blast, but may be blurring would help to avoid the printing artifacts even more? I am happy to hear that you are consider testing it.
Best,
Tomasz
Hi Tomasz,
Yeah maybe you are right. Directly postcuring might be the way to go.
I’ll try and add it in the next release.
Technically it’s not that hard. It’s more of an administrative thing to build it in, make sure it works etc.
And some kind of explanation on how to use it.
Elco


